DIY Christmas Crib Ideas to Make at Home: Creative Ideas To Try With Your Kids
Sherine Paul Solomon
What's Christmas without a beautifully decked crib in your house to celebrate the birth of Christ. There is no one way to put up the crib, so here are some ideas to make your Christmas crib stand out!

Christmas trees, twinkling lights, a bright star, pretty stockings, colorful baubles, candles, and the humble Christmas crib or nativity scene are all a huge part of the celebrations. The popular carol 'Away in a Manger', gives us a clearer picture of the reason for placing a Christmas crib at home every advent season.
"Away in a manger, no crib for a bed,
The little Lord Jesus, lay down his sweet head.
The stars in the night sky; looked down where he lay.
The little Lord Jesus; asleep on the hay!"
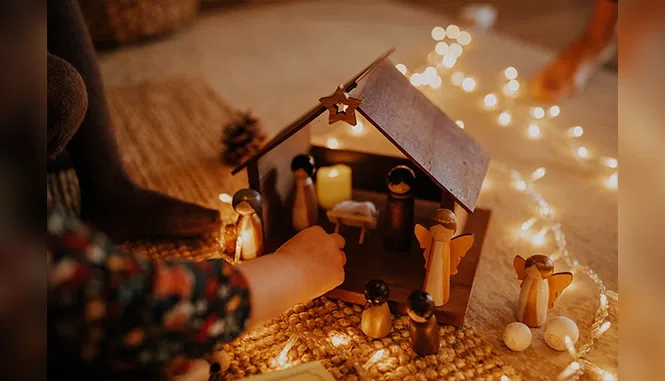
Let's take a look at some fun ways for you to add your own personal touch to the nativity scene with the help of your children. The unique creative elements will help set your crib apart from the rest.
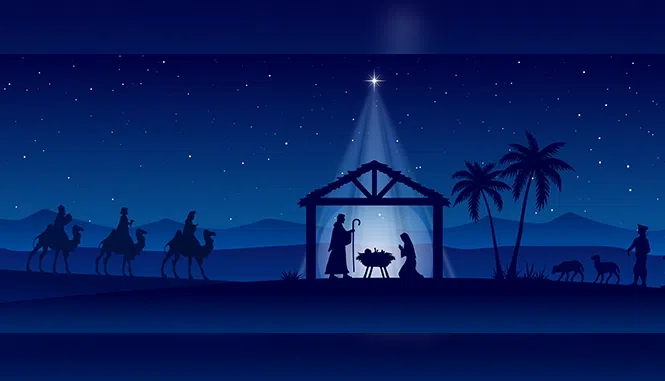
The nativity scene depiction dates back thousands of years and is a tradition to celebrate the birth of Jesus in a simple manger. St Francis of Assisi wanted to bring attention to the simple environment that Jesus was born in and created the original nativity scene in 1223. Ever since then nativity scenes have become an integral part of Christmas with portrayals of the birth of Jesus found in homes, churches, and malls. Characters found in the 'Gospel of Matthew and Luke' can be seen replicated in manger scenes.
Must-haves in a Christmas crib
Although there are a lot of elements that can make your Christmas crib stand out, certain figures are integral to the whole picture. These are the main figures included in the nativity scene placed either in a barn or some sparse structure.
Baby Jesus: At the center of it all is the newborn baby, born in a stable and sleeping in a trough as there was no place at the inn
Mary: The mother of Baby Jesus is always closest to the newborn baby
Joseph: Mary's husband Joseph is usually placed standing beside his wife
Three wise men: The three wise who came from the east followed a star to the stable. They are usually represented with the presents they brought for the newborn - gold, frankincense, and myrrh
Shepherds: Shepherds who were watching their sheep were informed of the birth of the newborn by an angel. They made their way to the manger with their sheep
Farm animals: Animals that are part of the scene include a donkey, ox, sheep, and the camels on which the three wise men arrived
Things that can spruce up your Christmas crib
There are a number of ways in which you can do some fun projects with your child to add a special touch to your Christmas corner. Here are a few ideas you can try with your child to form a new Christmas tradition.
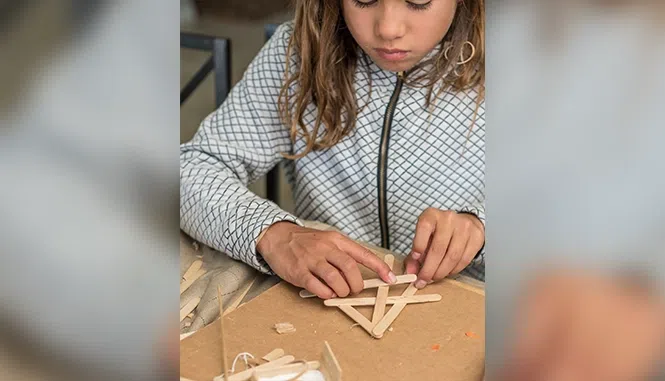
Popsicle stick crafts
There are two crafts you can do with your child using popsicle sticks. If you have a lot of time on your hands you can build a stable with your child. If you are pressed for time can create a mini nativity scene with a few popsicle sticks
Popsicle stick stable
Materials
|
Instructions
Step 1: Create a template of the stable with your cardboard pieces, keep the two sides short, a long back, and the front open. Finish it with two pieces for the roof
Step 2: Stick your cardboard pieces together to form your stable
Step 3: Stack your popsicle sticks side by side and cover the cardboard. Paste them onto the cardboard and complete your stable
Step 4: Place some straw within the finished stable and place your nativity scene figurines inside your completed stable
Popsicle stick family scene
Materials
|
Instructions
Step 1: Cut a square with your piece of cardboard, and cut six of the sticks to the size of the cardboard. Paste them together with the curved end on top. Attach two more popsicle sticks at an angle to form the roof
Step 2: Take three popsicle sticks to create Baby Jesus, Mother Mary, and Joseph. Cut bits of fabric and wrap it around each stick - white for baby Jesus, blue for mother Mary, and brown for Joseph. You can use whatever fabric you have at home. Stick them onto the stick. Draw eyes with a sketch pen
Step 3: Stick your three characters onto the stable structure towards the bottom while adding some straw behind them
Step 4: Draw a star on your yellow paper and cut it out. Stick it above baby Jesus's head
Step 5: Your mini nativity family scene is ready and can be placed in a place of pride in your home
Simple ornament

Materials
|
Instructions
Step 1: Place your piece of straw or moss at the base of the bauble through the opening. Stick it to the base
Step 2: Stick your three figurines on top of the straw
Step 3: Attach a string or ribbon to the top of the bauble
Step 4: Hang it with your child on your tree or a suitable nail in your house
Nativity scene box
Materials
|
Instructions
Step 1: Place your shoebox sideways. Paint the outside brown and the inside yellow
Step 2: For Mary's dress, create a cone with a sheet of light blue paper. Draw a face on skin-colored paper and tape it to the top of the cone
Step 3: Create a cone for Joseph's robe with a color of your choice, Paste a face at the top for him as well. Attach a headdress-shaped piece of paper at the back of the head. Make Mary and Joseph in proportion to the size of the box
Step 4: Make a cone with brown paper, trim the bottom half to form a manger shape, and see that it rests on its own. Fill the manger with shredded yellow crepe paper
Step 5: Cut a small round piece from white paper and skin-colored paper to make baby Jesus. Place the completed bit on top of the manger
Step 6: Stick a glitter star at the front of the box in the middle. Place your characters inside and your nativity scene is ready
Create your own manger
Materials
|
Instructions
Step 1: Paint your craft basket with a paint color of your choice and leave it to dry
Step 2: Mix your paints to create a skin color shade, paint the small polystyrene ball with this shade. Place it on a toothpick to make painting easier. Once dry, draw two eyes and a mouth
Step 3: Cut a strip of white felt and wrap it around the ball, stick it with a piece of tape
Step 4: Attach a colorful piece of cloth with glue as a border around the basket and brighten it up
Step 5: Fill the basket with straw or you can color a piece of paper and shred it finely
Step 6: Place your baby Jesus inside the craft basket and choose a place for it in your home
Star of Bethlehem

Materials
|
Instructions
Step 1: Draw an outline of a star with a long tail with your child. Let your child color the inside of the star yellow or gold
Step 2: Carefully cut along the outline of the star
Step 3: Place the star above your nativity scene
Egg carton nativity scene
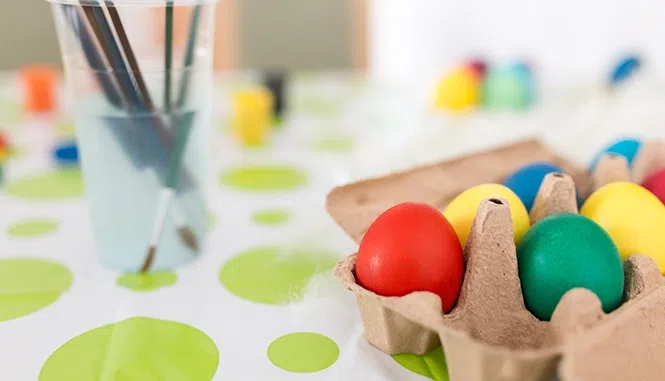
Materials
|
Instructions
Step 1: If there is a pointy cone shape in your egg carton, cut it out in one of the cartons
Step 2: Paint the lid of the carton inside and outside midnight blue to depict the night sky. Leave it to dry
Step 3: Paint the base of the egg carton dark brown and leave it to dry
Step 4: Take two of the wooden people figurines, create a skin color tone with your paint palette and paint the faces of the two figures. Leave to dry
Step 5: Draw a beard with your marker on the doll representing Joseph and paint the body brown. For your second doll paint the body blue to represent Mary. Leave to dry
Step 6: Cut a rectangular strip of felt that will fit round the wooden people figurines - light blue for Mary and green for Joseph. Wrap the strips around the wooden people and stick them with glue dots
Step 7: You can add other embellishments as you and your child like in way of headgear with felt. Draw the features for Mary and Joseph with a thin black sketch pen.
Step 8: Take your second egg carton, and cut out one of the egg dimples. Trim it at the edges with a scissor and bend it outwards to create a crib for Baby Jesus. Paint the crib dark brown. Leave to dry
Step 9: Cut a small circle from the second egg carton to create the head of Baby Jesus. Paint it in a skin tone color and leave it to dry. Draw features with a sketch pen
Step 10: Cut a small rectangular felt strip to form the blanket wrapped around baby Jesus. Wind it around and stick it with glue dots.
Step 11: Cut the yellow crepe paper into thin strips to make it look like straw. Fill the base of the first carton with the straw.
Step 12: Place baby Jesus inside the crib and place him at the center of the carton. Place Mary and Joseph on either side of the newborn, you can stick them onto a small stone or piece of cardboard to make them stand straight.
Step 13: On your midnight blue sky stick a large gold glitter star sticker. You can add additional smaller stars or snowflake stickers as you prefer
Handmade bauble

Materials
|
Instructions
Step 1: Print a number of nativity scene silhouettes, place them inside the bauble and see if they fit perfectly
Step 2: Stick the silhouettes to the bauble
Step 3: Attach a piece of string or festive ribbon to the top of the bauble
Step 4: Hang up your creation on your tree
Lights
If you want to keep things super simple and already have your nativity scene ready, you can also brighten up your corner with some festive lights. You can either fit the crib with fairy lights, lights in the shapes of Christmas trees, stars, or any other fun shape, or place small LED candles to add something extra to the scene.
So this Christmas make something meaningful with your child and celebrate the true reason for the season.


")


")


")


Comments
Edit
Comment Flag
Cancel Update